
RADIUS authentication in SQL Developer on MacOS
24 Feb 2017 →
There’s an updated, simpler version of this post that you’ll want to use for current versions of SQL Developer.
This post will walk you through configuring SQL Developer to perform RADIUS authentication on MacOS. I periodically need to do this to connect to databases that require multi-factor authentication (MFA) and I struggle with it every time. More than anything, this is just yet another entry in my Oracle Survival Guide to help future-me waste less time. Hopefully it helps others too!
A note on versions
Version matters here. While SQL Developer will let you point to any instant client you like, it’ll secretly be expecting a specific version that depends on which version of SQL Developer you’re using. If you don’t point it to that exact version of Instant Client, things won’t work—and it won’t be clear why.
As of the writing of this post, the latest versions are SQL Developer 4.2.0 and Instant Client 12.1.0.2. That’s what I’ll use in this guide.
Download these resources directly from Oracle. The Homebrew packages available strip out the .jar files which
confuses SQL Developer.
1. Install instantclient
Download instantclient 12.1.0.2 from Oracle.
You’ll only need the basic package. Unzip this package and place it in an accessible location.
I install my instant client in ~/lib/instantclient_12_1. You can install yours
wherever you like.
Oracle delivers this library to you in a broken state. Your instantclient contains a dynamic library called libclntsh.dylib.12.1,
but every bit of software you’ll want to use will be looking for libclntsh.dylib.
cd into your instantclient directory and ln -s libclntsh.dylib.12.1 libclntsh.dylib to un-broken it.
2. sqlnet.ora
The OCI driver properties can be configured via a special file called sqlnet.ora. The property
we’re interested in is SQLNET.AUTHENTICATION_SERVICES.
Create a sqlnet.ora file and place it in a directory you’ll reference later as TNS_ADMIN.
Make sure sqlnet.ora file has an entry for radius:
SQLNET.AUTHENTICATION_SERVICES=(none,radius)
3. Mangle the java.library.path property
Modern MacOSes—version 10.11 (El Capitan) and newer—have a feature called System Integrity Protection (SIP)
which ignores the DYLD_LIBRARY_PATH environment variable. This is how the instantclient path
is typically revealed to SQL Developer. SQL Developer still looks at this environment variable even though we
can no longer use it. It’s simply not an option for setting this path.
Instead we can clobber the java.library.path via a not-so-invasive configuration file, ~/.sqldeveloper/4.2.0/sqldeveloper.conf.
Create this file and set java.library.path to your instantclient path:
AddVMOption -Djava.library.path=/Users/ding0057/lib/instantclient_12_1
4. Set the TNS_ADMIN path for GUI applications
You must set the TNS_ADMIN environment variable to make this work. Note that this needs to be set in
the GUI environment via launchctl—simply setting the environment variable
in a terminal will not work. Unfortunately, values set via launchctl don’t persist between sessions
(if you logout or restart, the value is lost).
In order to set this value upon start, create a ~/Library/LaunchAgents/oracle.plist
file that looks like this (replace the path with your own):
<?xml version="1.0" encoding="UTF-8"?>
<!DOCTYPE plist PUBLIC "-//Apple//DTD PLIST 1.0//EN" "http://www.apple.com/DTDs/PropertyList-1.0.dtd">
<plist version="1.0">
  <dict>
    <key>Label</key>
    <string>Set TNS_ADMIN at login</string>
    <key>ProgramArguments</key>
    <array>
      <string>sh</string>
      <string>-c</string>
      <string>launchctl setenv TNS_ADMIN /directory/where/sqlnet.ora/lives</string>
    </array>
    <key>RunAtLoad</key>
    <true/>
  </dict>
</plist>
Note that TNS_ADMIN should point to a directory—not a file.
You’ll need to logout or restart for this change to become active.
4. Configure SQL Developer to use OCI
Now, fire up SQL Developer. Navigate to Oracle SQL Developer > Preferences and choose Database > Advanced:
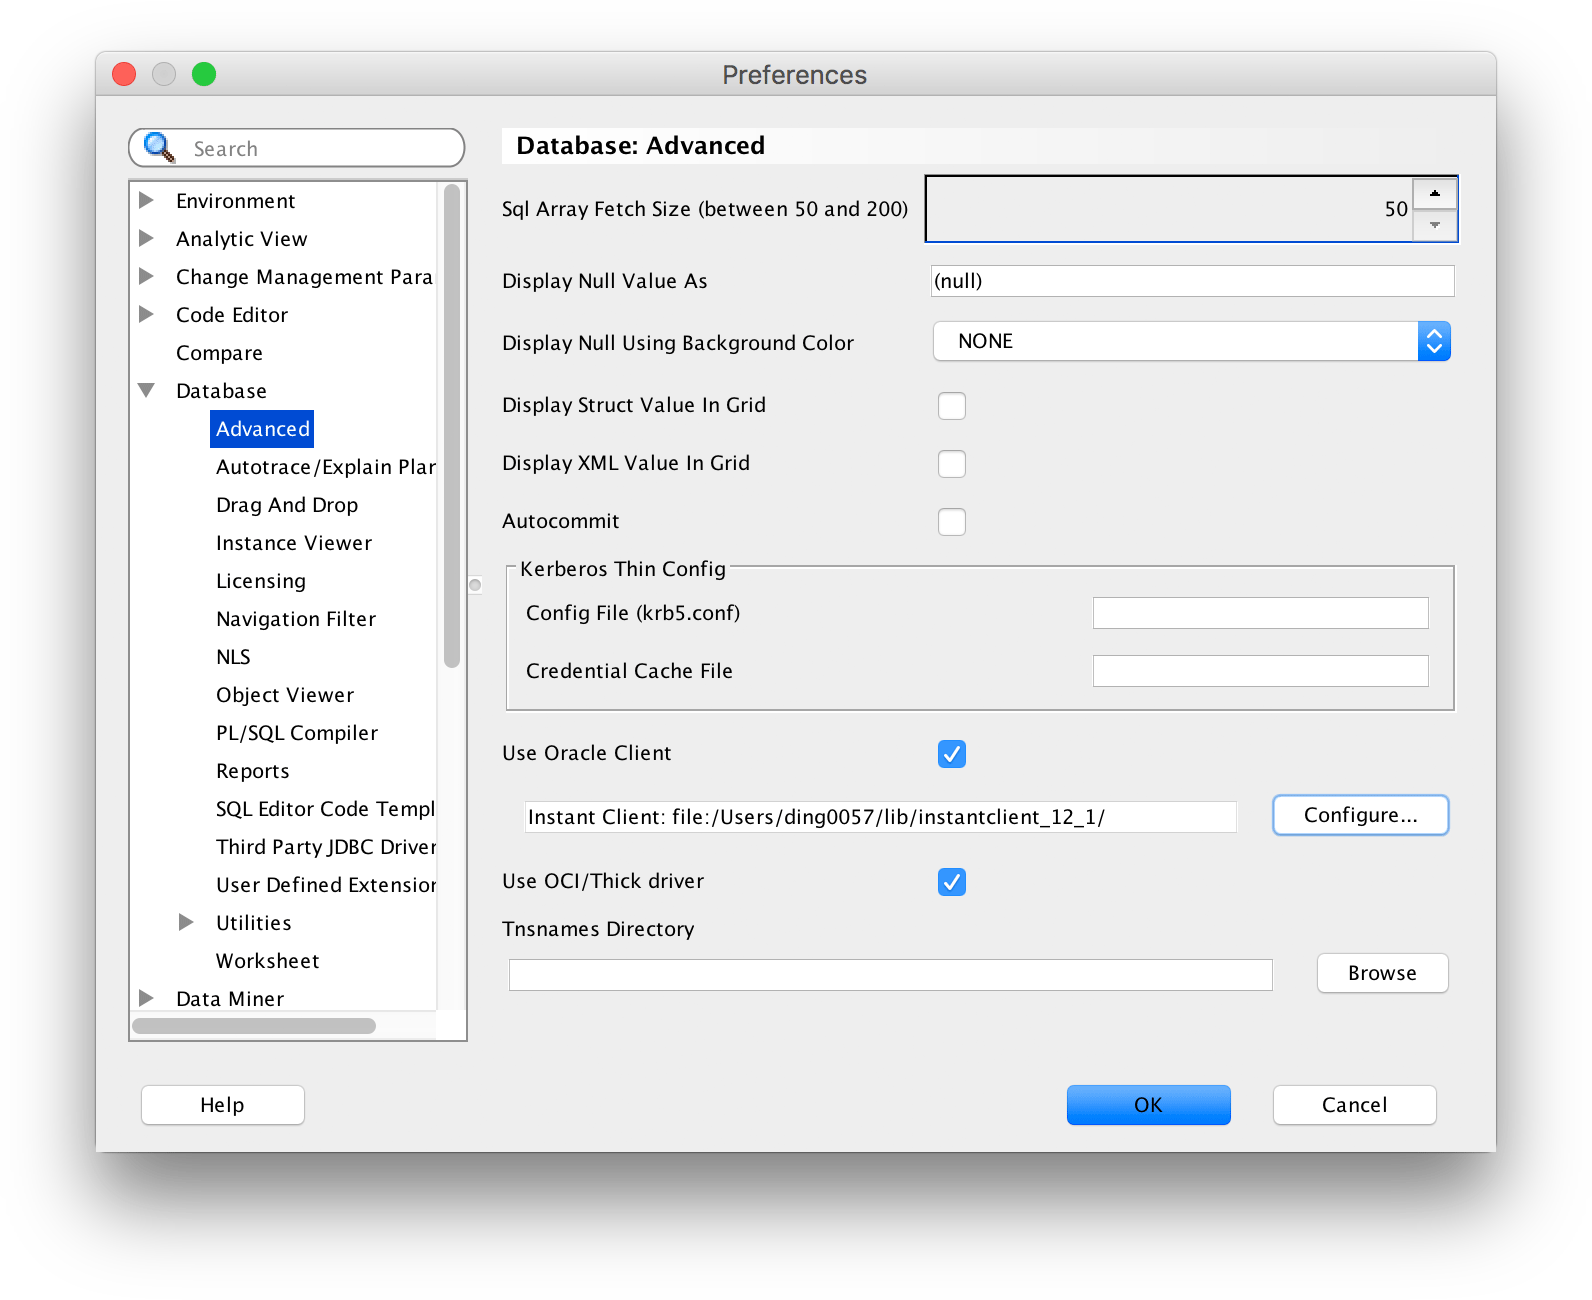
Check the Use Oracle Client and Use OCI/Thick driver checkboxes.
Then, click Configure and enter the location of your instantclient:
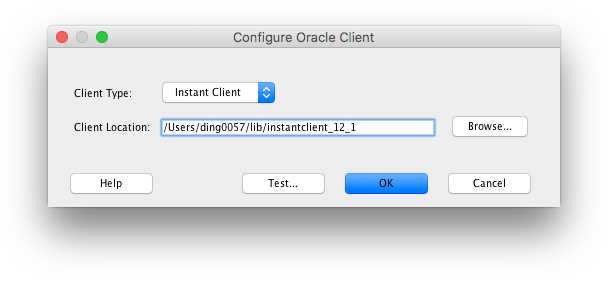
Don’t worry about clicking the Test button here. Its output is not useful (failures here do not necessarily indicate a broken configuration). Even when everything is working this test fails—ignore it.
5. Verify
In SQL Developer, go to Oracle SQL Developer > About Oracle SQL Developer. Click on the Properties tab
and search for the sqldeveloper.oci.available property. If the value is true, everything is set up correctly.
You should now be able to authenticate using RADIUS!
References
- https://community.oracle.com/thread/3995451
- http://ilmarkerm.blogspot.com/2015/03/setting-up-sql-developer-with-instant.html